 Skip to content

Let me guess. You just chopped down a plant you’ve been staring at for months, and now you’re holding a jar of buds wondering if you’re already finished. I get why you’d think that. The hard part felt like it was growing the thing. Drying it out seems like the easy victory lap.
It’s not. Drying is step one. Curing is the part that actually decides whether your weed tastes like something you’d pay for, or something that burns your throat and smells like fresh-cut grass. 😬
I’ve messed this up before. I once rushed a batch because I couldn’t wait, and it smoked harsh and tasted like hay for weeks. I’ve also let a jar sit patiently for two months and watched it turn into something that smelled better every single time I opened the lid. Same plant genetics, same grow, totally different outcome. The only variable was time and attention after harvest.
This guide walks through the whole cannabis curing process explained in plain language: what curing actually does to the plant, the humidity numbers that matter, the burping schedule that works, the mistakes that ruin jars, and a real strain example (Candy Gas strain, a sweet-and-gassy hybrid with a big terpene profile) to show how this plays out with an actual flower people are growing and buying right now. Grab a coffee. This one’s long, but you’ll walk away knowing exactly what to do. ☕
I’m not going to hand you some vague “just be patient” advice and call it a day. You’re going to get real humidity numbers, a real burping schedule, real mistakes people actually make (including me), and the exact reasoning behind each step, so you’re not just following instructions blind. Once you understand why each part matters, you’ll be able to adjust on the fly for your own climate, your own strain, and your own setup instead of panicking the first time something looks slightly off. That’s the actual goal here.
Drying vs. Curing: They Are Not the Same Thing 🔍
People use “dry and cure” like it’s one word. It’s actually two separate jobs, and mixing them up is where most home growers go wrong.
Drying is about getting rid of the water sitting in the plant’s stems, leaves, and outer bud tissue. This is a safety step first. Wet cannabis molds. You hang or rack your buds in a dark space with airflow until the outside moisture is mostly gone and small stems snap instead of bend.
Curing starts after that. It happens inside sealed jars, and it’s a slow chemical process, not just “letting it sit.” According to a cultivation-science breakdown from Athena Agriculture, curing lets residual enzyme activity inside the plant tissue keep working after harvest, breaking down chlorophyll and other harsh-tasting compounds while stabilizing cannabinoids and locking in the terpenes that give a strain its smell and flavor.
That’s the part people skip. They dry the bud, it looks green and pretty, and they figure the work is done. But a bud that’s just dry still has chlorophyll in it (that’s the “cut grass” smell and the harsh scratchy hit), and its terpenes haven’t had time to settle into the smoother, rounder aroma a properly cured jar develops. Grow Weed Easy puts it simply: buds that are dried and cured properly end up denser, better smelling, and smoother to smoke than buds that only went through a quick dry. 🌱
Think of it like coffee beans. Green coffee beans aren’t coffee. Roasting changes them. Curing is cannabis’s version of that transformation step, minus the heat.
Curing Isn’t a Cannabis Invention 🍃
Here’s something that surprised me when I first looked into this. Curing as a food and crop process has been around way longer than legal cannabis has. According to the general curing overview on Wikipedia, the same basic idea shows up in vanilla, tobacco, and tea processing. Vanilla beans get killed, sweated through oxidation, slow-dried, and conditioned before they smell anything like the vanilla you know. Tobacco leaves go through a curing stage that develops their flavor and lowers harshness before rolling. Tea leaves get cured as part of standard processing too, and it’s what turns a flat, grassy leaf into something with actual character.
Cannabis curing works on the same principle: reduce sugar content, break down chlorophyll, and let a slow, low-and-controlled process finish what a fast dry can’t. So if you’ve ever wondered why this step feels so fussy compared to just “letting weed dry out,” it’s because you’re not doing something unique to cannabis. You’re doing the same thing farmers have been doing to tobacco and tea leaves for centuries. The plant changes are just different enough that the specific numbers (humidity, time, temperature) are its own thing. 🌱
Why Curing Actually Matters (The Science, Kept Simple) 🧪
Here’s what’s happening chemically while your jar sits on the shelf, broken down without the lab jargon.
Chlorophyll breaks down. Chlorophyll is what makes plants green, and it tastes bad when you burn it. It’s the reason freshly dried weed can taste like a lawnmower just drove through your mouth. Slow curing gives the plant’s own enzymes time to break that chlorophyll down, which is a big part of why a properly cured jar smokes smoother than a rushed one.
Sugars and starches get used up. Residual plant sugars left in the tissue after drying contribute to harshness and a “hot,” scratchy smoke. Curing time lets those residual compounds metabolize down instead of just sitting there waiting to be combusted.
Terpenes develop, they don’t just survive. This is the one people misunderstand the most. Terpenes are the aromatic oils that give a strain its specific smell (citrus, gas, berry, pine, whatever). They’re volatile, meaning they evaporate easily, especially with heat. A fast, hot dry cooks a lot of them off before they even make it to the jar. BudTrainer’s 2026 drying guide notes that monoterpenes like myrcene and limonene start evaporating noticeably above 70°F, so a rushed, warm dry strips aroma out of the bud before curing even begins. Once the bud is jarred, the terpenes that survived the dry continue to develop complexity as the cure goes on, which is why a jar at week six almost always smells better than the same jar at week two.
Cannabinoids stabilize. THC-A slowly converts toward more stable forms over time, and a controlled cure environment (not too wet, not bone dry) helps protect that process instead of letting heat or oxygen degrade it. This is also why properly cured flower tends to test more consistently than flower that got rushed to market.
There’s also a flip side worth knowing about. THC degrades into CBN over time when it’s exposed to heat, light, and oxygen, and that degradation speeds up under bad storage conditions (too warm, too bright, too much air exposure). A good cure and good long-term storage isn’t just about building flavor, it’s also about protecting the potency you already worked hard to grow. That’s the same reason a dark cabinet at a stable room temperature keeps showing up as the recommendation throughout this guide. It’s not just about mold, it’s about keeping the cannabinoids you have from quietly breaking down into something weaker.
None of this is instant. It’s not a switch that flips. It’s closer to fermenting something, or aging a cheese. You’re not preserving the bud in a static state, you’re actively letting a chemical process finish. 🧀
Step One You Can’t Skip: Get the Dry Right First 🌬️
You cannot cure your way out of a bad dry. If you rush the dry, the terpenes are already gone, and curing afterward just polishes a flower that’s missing half its potential flavor.
The current standard a lot of growers reference is the “60/60 rule”: dry at roughly 60°F with 60% relative humidity, in a dark space, with gentle indirect airflow (not a fan blasting straight on the buds). Paramount Seed Farms calls the 60/60 rule the current industry standard, and points to research showing monoterpenes can lose more than half their content in the first week of drying if temperatures run above 68°F. That’s a huge chunk of your strain’s smell and flavor, gone, just from drying too hot and too fast.
A few practical drying notes:
- 🕐 Give it time. Most guidance lands on a 10 to 14 day drying window for whole colas hung in a tent or dry room. BudTrainer is blunt about this: a bud dried in 4 days will smell flat next to the same bud dried in 10, and no amount of curing recovers what a fast dry destroys.
- 🌡️ Keep the room cool and stable. 60 to 68°F, 55 to 65% relative humidity, according to multiple grower guides including Grow Weed Easy.
- 🌑 Keep it dark. Light degrades cannabinoids and terpenes. A closet, tent, or blacked-out room works.
- 🌀 Airflow should be indirect. You want air moving through the room, not blasting straight onto the buds. Direct airflow dries the outside too fast while the inside stays wet, which sets you up for mold later.
- ✂️ Know when it’s done. The classic test: small stems should snap cleanly instead of bending. If a stem still bends, it needs more time.
Once your stems snap and the outer bud feels dry to the touch (while the inside still has a little give), you’re ready to jar it up and start the actual cure.
The Cannabis Curing Process Explained, Step by Step 🫙
Okay, here’s the actual walkthrough. This is the part people search for, so let’s get specific.
Step 1: Trim and Jar
If you’re dry trimming, knock off the remaining sugar leaves now. Load your buds loosely into wide-mouth glass mason jars. Don’t cram them in. Paramount Seed Farms recommends filling jars to about 75% capacity, which leaves headspace for air to actually move around the bud instead of just sitting stagnant against glass.
Glass is worth the extra effort over plastic bags or bins. It doesn’t hold static, doesn’t leach anything, and it’s easy to check on visually without opening the lid every time.
Step 2: Get a Hygrometer in There
You want a small digital hygrometer, either sitting in the jar itself or in a dedicated “sentinel” jar that represents the rest of your batch. Blimburn Seeds is specific about this: use a calibrated digital hygrometer, never an analog one, because analog gauges drift and aren’t precise enough for this job.
Your target during the cure is 58 to 62% relative humidity. That range shows up consistently across current grower guidance. Trimleaf pegs the optimal curing RH at 58 to 62%, calling it the range that preserves terpenes while keeping mold away. Oilslickpad’s 2026 guide breaks it down even further: lean toward 62% for most flower, and drop to 58% for dense, resin-heavy buds that hold moisture longer inside the cola.
Step 3: Add a Two-Way Humidity Pack
This is the single easiest upgrade you can make to your cure. A two-way humidity control pack (Boveda and Integra Boost are the two big names) sits in the jar and actively releases or absorbs moisture to hold a specific RH setpoint. If the jar gets too dry, the pack releases moisture. If it gets too humid, the pack pulls moisture out. It’s not passive, it’s actually regulating.
Sizing matters here. A Size 8 pack (8 grams) is the standard fit for a 1-quart mason jar holding about an ounce of flower, per Paramount Seed Farms. Bigger containers need bigger packs, or multiple packs, to hold steady.
If you’re wondering whether Boveda or Integra Boost is better, current side-by-side testing referenced by Paramount Seed Farms shows they perform about equally. Pick whichever one you can get consistently and stick with it.
Step 4: Burp the Jars (Daily, at First)
“Burping” just means opening the jar for 5 to 10 minutes to let built-up CO₂ out and let fresh oxygen in. This matters because the enzymatic breakdown happening inside the bud needs oxygen to keep going, and a sealed jar that never gets opened turns anaerobic (no oxygen), which is exactly the condition that causes a sharp ammonia smell. 🙅
Here’s a realistic burping schedule pulled together from current grower guidance:
- Week 1: Burp once or twice a day, 5 to 10 minutes each time. This is the highest-risk window for excess moisture, so check often.
- Week 2 to 3: Burp every other day, or every 2 to 3 days once your hygrometer readings start holding steady. Distru’s cannabis inventory guide notes most flower is well on its way to a good cure by week 4, at which point you can drop to burping just 2 to 3 times a week.
- Week 4 to 5: Burp once a week.
- Week 6 and beyond: The active cure is mostly finished for most strains by week 6 to 8, according to Paramount Seed Farms, though some strains keep slowly improving for 2 to 3 months, per BudTrainer.
One honest note from that same BudTrainer guide stuck with me: the flavor difference between week 2 and week 6 of a cure is not subtle. It’s the difference between “this is fine” and “this is why I grow my own.” If you’ve never let a jar go past three weeks, you genuinely haven’t tasted what that strain can actually do. 🎯
Step 5: Watch for Warning Signs, Not Just the Clock
Don’t treat the schedule above as gospel. Your jar will tell you what it needs if you pay attention.
- 👃 Smell ammonia when you open the lid? That’s too wet. Pull the buds out, spread them on a paper bag or screen for a few hours to a day, then rejar.
- 🍂 Buds feel dry and crumbly, hygrometer reading below 55%? That’s too dry. A humidity pack fixes this on its own, or you can add a small piece of orange peel or a slightly damp paper towel for a few hours (remove it before it touches the bud directly, and don’t leave organic material like citrus peel in there long term, since it can introduce its own mold risk).
- 🟢 Hygrometer steady in the 58 to 62% range and the smell is getting sweeter, not grassier, over time? You’re doing it right. Keep going.
Jars Aren’t the Only Option: Comparing Curing Containers 🗃️
Mason jars are the default answer, and for good reason (cheap, reusable, easy to see through). But they’re not the only tool people use, and it’s worth knowing the alternatives so you can pick what actually fits your setup.
Mason jars. Cheap, reusable, and you can see exactly what’s happening without opening the lid. The tradeoff is that you have to manually burp them on a schedule, and if you forget, humidity can spike fast in a small sealed space. This is the right call for most home growers with a few ounces to a few pounds.
Grove Bags (TerpLoc-lined bags). These are purpose-built curing bags that actively regulate humidity through the bag material itself, without you having to manually burp at all. Happy Hydro’s guide to Grove Bags explains that you dry cannabis to roughly 10 to 12% moisture content first, then fill the bag about 75% full (same headspace logic as a jar) and seal it. Heat sealing the zipper adds a small edge in performance, but bags still work well without it. On a real grower forum, a THCFarmer thread had multiple users reporting buds that held around 61% humidity for close to a year in these bags with zero manual burping and no mold issues. If you hate the daily burping routine, this is the alternative worth trying.
Turkey bags (the old-school hack). Before Grove Bags existed, plenty of growers used plain oven turkey bags as a cheap curing vessel, and some still do. The problem, according to Grove Bags’ own comparison, is that turkey bags are more porous than purpose-built curing bags, so oxygen and moisture move through the material more freely, which makes it harder to hold a stable environment over time. They’re fine in a pinch or for short-term curing, but people who use them long term often end up storing them inside a sealed tote or bin for extra protection, which kind of defeats the “simple and cheap” appeal.
Vacuum sealing. This one splits growers into two camps. Some people vacuum seal cured bud for long-term storage once the cure is finished, since removing the air (and therefore the oxygen) slows down degradation from light, heat, and oxidation. A grower on the Rollitup forum described the same logic: once cannabis hits peak flavor, sucking the air out locks it in roughly that state, and swapping in nitrogen instead of just removing air works even better for long-term storage. The catch is that a straight vacuum seal flattens and compresses the bud, which can knock trichomes off, so people who care about bag appeal often vacuum seal inside a rigid container instead of a flat bag. Other growers on HomeGrowed actually use vacuum sealers as their primary curing method (not just final storage), reporting denser buds and a faster-developing aroma compared to jars or turkey bags.
None of these methods are “wrong.” Jars give you the most control and visibility. Grove Bags trade a bit of hands-on control for consistency and way less daily maintenance. Turkey bags are the budget option with real limitations. Vacuum sealing is best saved for locking in a cure that’s already finished, unless you’re specifically experimenting with it as your primary method. Pick based on how much daily attention you actually want to give this. 🎒
Water Activity: The Number Serious Growers Actually Track 📊
Relative humidity (RH) is what you’re reading on your hygrometer, but there’s a related, more precise measurement worth knowing about: water activity, written as “aw.”
RH tells you the humidity of the air inside the jar. Water activity tells you how much of the water inside the plant tissue itself is actually available for mold, yeast, or bacteria to use. They’re related but not identical, and once your flower is sealed in a jar and has reached equilibrium, they end up tracking pretty closely.
The commercial cannabis industry has settled on a clear standard here. ASTM’s D8197 specification sets the acceptable water activity range for dry cannabis flower at 0.55 to 0.65 aw: below 0.65 to prevent microbial growth, above 0.55 to prevent the flower from getting so dry it becomes brittle and starts losing potency in handling. AROYA’s cannabis testing guide explains that most mold species won’t grow below 0.70 aw, but some can start at 0.65, which is why the industry treats 0.65 as the hard ceiling rather than cutting it close. Staying closer to 0.60 to 0.62 gives you a buffer in case the product experiences any temperature swings later.
California’s cannabis regulations actually require dried flower to test under 0.65 aw before it can legally be sold, according to ARES Scientific, and several other legal states follow similar rules. So when you’re aiming for 58 to 62% RH in your jars at home, you’re landing in the exact same window that commercial testing labs require. That’s not a coincidence. It’s the range where cannabis is stable: wet enough to keep terpenes intact, dry enough that mold can’t get a foothold. 🎯
If you want to get technical, a dedicated water activity meter is the tool commercial growers use, but for home curing, a good digital hygrometer inside a sealed jar gets you close enough once the jar has had a few hours to reach equilibrium.
A Real Example: Curing the Candy Gas Strain 🍬💨
Let’s make this concrete with an actual strain, because “preserve the terpenes” means something different depending on what terpenes you’re actually dealing with.
Candy Gas is a hybrid that’s become a favorite in the sweet-and-gassy category, generally traced back to Gelato 41 and Runtz genetics. According to Herb’s 2026 strain breakdown, the dominant terpenes in Candy Gas are limonene, caryophyllene, and myrcene, three terpenes that each behave differently once you understand what they contribute.
- 🍋 Limonene brings the bright, sweet, citrus-candy top notes that hit you first when you crack a jar. It’s associated with mood elevation, which lines up with the uplifting first wave a lot of users report.
- 🌶️ Caryophyllene is the spicy, peppery backbone behind the “gas” side of the name. What makes it interesting scientifically is that it’s the only terpene currently known to interact directly with cannabinoid receptors (specifically CB2), which is why it’s tied to anti-inflammatory and calming effects beyond just smell, according to Candy Gas Strain Clinic’s breakdown.
- 🌲 Myrcene rounds things out with an earthy, musky note and a reputation for physical relaxation, which is part of why Candy Gas tends to lean indica-dominant in how it feels despite the bright candy nose up front.
Here’s why this matters for curing specifically. SeedsHereNow’s review notes that craft-grown Candy Gas regularly tests above 2% total terpene content, and JointCommerce’s strain guide puts well-grown Candy Gas jars in the 2.0 to 4.0% terpene range, noting that higher totals correlate directly with a louder aroma and better flavor carry-through from a dry pull all the way to the smoked or vaped hit.
That’s a lot of aromatic oil sitting in the trichomes, and every bit of it is volatile. If you dry Candy Gas hot and fast, you’re going to cook off exactly the terpenes that make it worth growing in the first place, the citrus top note from limonene disappears first (it’s one of the more volatile monoterpenes), leaving you with a flatter, muddier smell that’s mostly just “gas” with none of the “candy.” A rushed cure on this strain doesn’t just make it smoke harsher, it actively erases the specific flavor identity that makes Candy Gas different from every other diesel-leaning hybrid on the shelf.
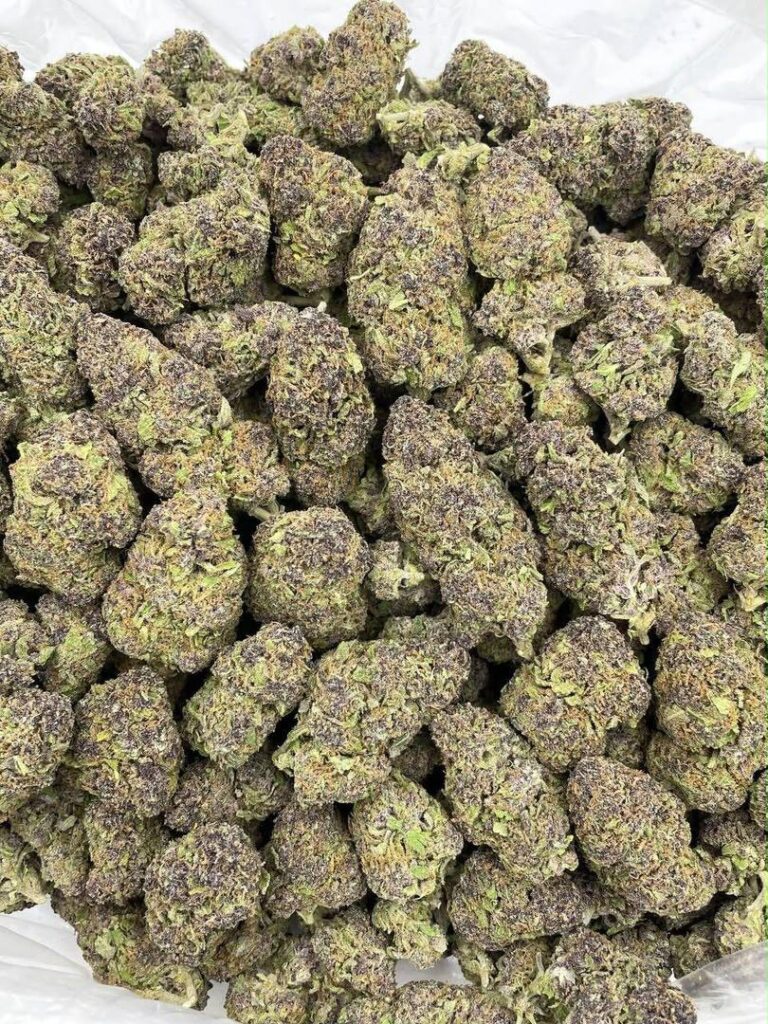
So a slow, controlled cure isn’t optional if you’re trying to actually taste what Candy Gas is supposed to taste like. Dry it at 60°F and 60% RH over the full 10 to 14 days. Jar it at 75% capacity. Hold the cure at 58 to 62% RH with a two-way humidity pack, leaning toward 62% since dense, resin-caked buds like Candy Gas tends to produce (deep purple, emerald, and orange coloring under a heavy resin coat, per SeedsHereNow) hold moisture longer in the center of the cola. Burp daily the first week, then taper off following the schedule above.
Do that, and by week four to six, you should be getting the full layered experience users describe: a sharp diesel-and-skunk blast right when you crack the jar, followed by vanilla, berry, and candy sweetness underneath, according to candygasstrain.com’s flavor breakdown. That layering is the terpene complexity actually finishing its development, and it’s exactly what gets lost when growers skip or rush the cure. THC on well-grown Candy Gas tends to test in the 20 to 25% range with CBD around 2%, per Shop Zaza’s strain guide, which is potent enough that the flavor and the effect both suffer noticeably if the cure gets rushed and the terpene-to-cannabinoid balance gets thrown off. 🍭
Pro Tip: Split Your Stash and Actually Test It 🧪🍯
If you harvested more than an ounce or two, do yourself a favor and split it into a few jars instead of curing it all as one giant batch you crack open the same day. Then open different jars at different points and actually compare them side by side.
A grower writing for 420 VapeZone described exactly this with two different strains: a Blueberry Kush that tasted best from week 4 all the way through week 10 before it started losing its fluffy, cooling quality, and a Gelato that tasted flat and generic until week 8, at which point it suddenly opened up into a full vanilla-honey-citrus flavor that wasn’t there earlier. Same grower, same process, two completely different timelines depending on the strain’s own chemistry.
That’s the real lesson. Cure time isn’t one-size-fits-all, and the only way to know your specific strain’s sweet spot is to actually taste it at different points instead of assuming week 4 or week 6 is automatically “done.” If you’ve got 4 or more ounces, crack a jar at week 4, another at week 8, another at week 12. You’ll learn more about your specific plant from that comparison than from any article, including this one. 😄
Does Curing Change Bud Weight or Lab Test Results? ⚖️
Quick, practical answer: yes, a little, and it’s normal.
Buds keep losing small amounts of residual moisture during the first couple weeks in the jar, even after a proper dry, so don’t be surprised if your total weight drops slightly between day one of curing and week three or four. This isn’t the cure “wasting” your harvest, it’s just the last bit of water finishing its exit, which is exactly the process that’s supposed to happen.
On the potency side, well-cured flower tends to test more consistently than flower that got rushed to market, mostly because a controlled cure protects cannabinoids from the kind of heat and oxygen exposure that degrades THC into CBN over time. That’s part of why commercial cultivators who sell into regulated markets treat curing as a compliance issue and not just a quality one: water activity testing (covered above) is often a legal requirement before flower can be sold at all, not just a nice-to-have.
Commercial Curing vs. Curing at Home: What Actually Differs 🏭
If you’ve ever wondered why a dispensary jar and your own home-cured batch can smell different even when it’s technically the “same” strain, the difference usually comes down to scale and equipment, not some secret technique being withheld from home growers.
Commercial operations cure in bulk, often in large bins, totes, or industrial curing rooms with computer-controlled humidity and temperature instead of a handful of mason jars on a shelf. They also test water activity with dedicated meters rather than relying on a jar hygrometer, since regulators in states like California, Nevada, Oregon, and Washington require documented water activity results before flower can legally be sold. That said, the underlying chemistry is identical. A commercial grow room chasing 58 to 62% RH is chasing the exact same number you’re chasing in your bedroom closet. Bigger equipment doesn’t mean a different process, it just means more consistency across a much bigger batch. You can absolutely match commercial-quality curing at home, it just takes more manual attention since you don’t have automated humidity control doing the work for you. 🏠
Common Curing Mistakes (And How People Actually Run Into Them) ⚠️
I want to cover this with real scenarios, not just a generic list, because these mistakes happen for pretty understandable reasons.
Mistake 1: Getting impatient and jarring buds that are still wet inside. This is the most common one. The outside of the bud dries fast because it’s exposed to air, but the inner stem and core stay wet for longer. If you jar too early, that trapped moisture has nowhere to go, and within a day or two you’ll crack the lid and get hit with a smell like ammonia or wet hay. That smell means anaerobic bacteria are breaking things down in a way you don’t want. The fix, straight from an actual grower thread on THCFarmer: pull the buds back out, lay them on a paper bag or dry rack for a day or two to let more moisture escape, then rejar and go back to a normal burping schedule. It’s not a disaster, it’s fixable, just don’t ignore it and hope it goes away.
Mistake 2: Forgetting to burp for a stretch, then panicking. Life happens. You forget the jars for three or four days during that critical first week, and now the RH spiked and things smell off. Distru’s guide for cannabis businesses points out this is one of the single biggest mistakes people make, right alongside its opposite problem below. If this happens to you, don’t panic, just open the jars, spread the buds out for a bit to release the buildup, check your hygrometer, and get back on schedule. A phone reminder genuinely solves this. Set one.
Mistake 3: Over-burping. This one surprises people. Some growers get so worried about mold that they leave jars open for hours at a time, multiple times a day. That’s not burping anymore, that’s just continuing the drying process, and it strips moisture (and terpenes) right back out. Distru calls this out directly: over-eager burping leads to over-dried flower that lacks flavor and smokes harsh, which is the exact opposite of what you’re trying to accomplish. Five to ten minutes is the target. Not an hour. Not “until I remember to close it.”
Mistake 4: Using an analog hygrometer, or no hygrometer at all. Guessing doesn’t work here. Blimburn Seeds specifically recommends calibrated digital hygrometers over analog ones because analog dials drift out of accuracy and aren’t precise enough to catch you before you cross into mold territory. A digital hygrometer costs very little and removes almost all the guesswork.
Mistake 5: Storing cured jars somewhere warm or bright. Curing doesn’t stop being sensitive to environment just because the active cure window is over. Oilslickpad’s 2026 guide is direct about this: anything above 77°F speeds up terpene loss and makes mold more likely, and UV light degrades cannabinoids even through some types of glass. A cool, dark cabinet at room temperature beats a sunny windowsill every time.
Mistake 6: Sticking jars in the fridge or freezer to “extend shelf life.” This feels intuitive but it backfires. Oilslickpad explains that a fridge cycles humidity every time the compressor kicks on, which is exactly the kind of instability that damages a cure over time. A freezer is worse for a different reason: it makes trichomes brittle and prone to snapping off, and trichomes are where most of your cannabinoids and terpenes actually live. Room temperature, dark, stable. That’s the formula.
Mistake 7: Choosing the wrong container for how hands-on you actually are. If you know yourself well enough to admit you’ll forget to burp a jar for a week straight, don’t fight your own habits, just use a Grove Bag or similar passively-regulating bag instead. A jar that never gets burped on schedule is worse than a bag that regulates itself. Match the tool to your actual attention span, not the one you wish you had. 😅
Mistake 8: Using low-density plastic bags and wondering why so much resin is stuck to the inside. Cheap sandwich-style ziplock bags cling to resin far more than higher-density materials like turkey bags or purpose-built curing bags, based on side-by-side observations shared by growers on the Rollitup forum. That resin loss isn’t just cosmetic, it’s trichomes (and the terpenes and cannabinoids inside them) sticking to plastic instead of staying on your bud. If you notice a visible resin film building up inside a bag after storage, that’s a sign the material itself is working against you.
Mistake 9: Not adjusting for your local climate. A cure schedule written for a dry climate doesn’t automatically work in a humid one, and vice versa. If you’re somewhere dry (high desert conditions, ambient RH in the 20 to 30% range), your jars lose moisture fast every single time you open the lid, so Oilslickpad recommends leaning toward 62% humidity packs and checking more often. If you’re somewhere humid (Gulf Coast summer conditions, 70%+ ambient RH), default to 58% packs and burp a bit more aggressively to keep ahead of mold risk. There’s no single universal setting, there’s a target range and you nudge within it based on where you live. 🌦️
Signs Your Cure Is Actually Working 👃🔥
You don’t need to just trust the calendar. Your senses will tell you a lot if you know what to check for.
- The smell rounds out. Fresh-dried bud often smells sharp, a little grassy, sometimes almost hay-like underneath whatever terpenes it has. As the cure progresses, that grassy edge fades and the strain’s actual aroma gets clearer and more layered. If it’s smelling more like itself and less like lawn clippings each week, that’s the chlorophyll breaking down like it’s supposed to.
- The texture firms up without going brittle. Buds should feel springy and a little sticky (depending on resin content), not crumbly or dusty. If a bud disintegrates when you break it apart, it’s too dry. If it feels wet or squishy, it needs more time or wasn’t dried enough before jarring.
- The burn improves. This is the real test. Grab a small pinch from the jar every week or two and just try it. Harsh, throat-scratching smoke that leaves you coughing is a sign of unfinished curing (or a rushed dry). A cured jar should hit smoother, with white ash instead of black or streaky ash, which is another indicator that chlorophyll and sugars have broken down properly.
- Your hygrometer holds steady without you fighting it. Early on, you’ll see swings after every burp. By week 3 or 4, a well-managed jar should barely move between burping sessions, sitting right around your 58 to 62% target. That stability is a good sign the cure has settled into equilibrium.
- Color deepens slightly, it doesn’t fade. Buds often look a touch richer and more saturated after a few weeks of curing compared to fresh off the dry rack. If colors are visibly fading toward dull brown or gray, that’s more often a sign of light exposure or heat damage than a normal part of curing.
If you’re checking these boxes, you’re doing it right, regardless of whether you’re exactly on the “textbook” schedule. Every strain and every grow environment is a little different. 🌿
Gear That Actually Makes a Difference 🧰
You don’t need a lab setup for this, but a few cheap tools genuinely change your outcome.
- Wide-mouth glass mason jars. Quart size is the standard for about an ounce of dried flower. Amber or dark glass adds a small layer of UV protection if you’re storing long term.
- Digital hygrometer, ideally more than one. One per jar if you’re being thorough, or at minimum one “sentinel” jar that represents your batch, per the approach Distru recommends.
- Two-way humidity packs (Boveda or Integra Boost). Get the right size for your container, an 8-gram pack per quart jar is the standard starting point.
- A dark storage box or cabinet. Cardboard works fine if it blocks light completely. The goal is just no UV exposure.
- Paper bags or a mesh drying rack. Useful backup for rewetting or drying out a jar that’s gone sideways in either direction.
- A cool, temperature-stable room. 60 to 70°F is the sweet spot for both the dry and the storage phase.
- A dedicated curing chamber (optional). If you’re curing large volumes regularly, a small climate-controlled chamber or cabinet gives you consistent temperature and humidity without babysitting every individual jar. This isn’t necessary for a personal grow, but it’s worth knowing it exists if you ever scale up.
- A permanent marker or labels. Write the strain name and jar date on the lid. It sounds obvious, but once you have four or five jars from the same harvest, you will absolutely forget which one you started burping first, and that matters when you’re trying to track how a specific batch is developing week to week.
That’s genuinely it. None of this is expensive, and most of it lasts for years.
Cure Timeline Cheat Sheet 📅
Here’s the whole thing laid out so you can just glance at it later instead of rereading this whole article.
- Days 1 to 10-14 (Drying): Hang or rack in the dark, 60°F, 60% RH, gentle indirect airflow. Done when small stems snap.
- Day 1 of jarring: Trim if needed, fill jars 75% full, drop in a Size 8 humidity pack (62% for most flower, 58% for dense buds), place a hygrometer in the jar.
- Week 1: Burp once or twice daily, 5 to 10 minutes.
- Weeks 2 to 3: Burp every 2 to 3 days as readings stabilize.
- Weeks 4 to 5: Burp once a week.
- Weeks 6 to 8: Cure is largely finished for most strains. Terpene-heavy strains (like Candy Gas) may keep improving.
- After week 8: Switch to a 58% pack if you’re smoking within 3 months, or hold at 62% for longer-term storage. Keep dark, keep cool, keep stable.
- Months 2 to 3+: Some strains keep developing subtle complexity here. Nothing wrong with just enjoying it at this point too.
Frequently Asked Questions ❓
How long should I cure cannabis before smoking it? Three to four weeks is the realistic minimum for a noticeable, worthwhile improvement in flavor and smoothness, based on current grower consensus. Six to eight weeks is where most strains hit their peak. Some strains, especially terpene-heavy ones, keep getting better for two to three months.
What humidity should curing jars be at? 58 to 62% relative humidity is the target range that shows up consistently across current cultivation guidance, striking the balance between preserving terpenes and preventing mold.
Why does my jar smell like ammonia? That smell means your buds went into the jar still holding too much internal moisture, and anaerobic conditions have set in. Pull them out, spread them on a paper bag for a day or so, then rejar and resume burping.
Can I speed up curing? Not without losing quality. There’s no shortcut that recovers what a rushed dry or an impatient cure costs you in flavor and smoothness. Some people use tools like Rapid Cure devices for fast-turnaround retail flower, but for personal stash, slow and steady genuinely produces a better product.
Do I need a humidity pack, or can I just burp manually? Manual burping alone can work if you’re diligent and check often with a good hygrometer, but a two-way humidity pack removes a lot of the guesswork and holds a steady setpoint automatically, which matters most in that first, high-risk week.
Is water activity the same as relative humidity? They’re closely related but not identical. Relative humidity is what your hygrometer reads in the air around the bud. Water activity measures how much water inside the plant tissue itself is actually available to support microbial growth. Once a jar reaches equilibrium, the two track closely, which is why keeping jar RH at 58 to 62% keeps you inside the same 0.55 to 0.65 aw window the cannabis industry uses as its safety standard.
Does strain matter for curing, or is it all the same process? The core process is the same for every strain, but terpene-dense strains like Candy Gas have more to lose from a rushed cure, and dense, resin-heavy buds hold internal moisture longer, so they may need a slightly longer dry and a touch more attention during burping compared to airier, less resinous flower.
Can I over-cure cannabis? Not really in the same way you can over-dry it, but leaving jars sealed for extremely long periods (many months to years) without any air exchange can eventually lead to slow degradation of terpenes and cannabinoids, even at good humidity. Occasional burping and stable storage conditions matter for the long haul, not just the first few weeks.
Should I cure differently for smoking versus vaping or making edibles? The dry and cure process itself doesn’t change much based on how you’ll use the flower, but the priorities shift a bit. If you’re vaping or planning to make rosin or other solventless extracts, terpene preservation matters even more than usual, since you’ll taste every bit of what survived the cure with nothing burning off to mask it. If you’re making edibles or extracts where you’ll decarb the material anyway, a slightly less obsessive cure is more forgivable, since flavor nuance matters less once everything’s cooked into a base or infused into oil.
Is it normal for buds to lose weight during curing? Yes. A small amount of residual moisture keeps leaving the bud during the first couple weeks in the jar, even after a proper dry. A few percent of weight loss during that window is expected and isn’t a sign anything went wrong.
What’s the difference between curing in jars and using Grove Bags? Jars require manual burping on a schedule and give you full visibility into what’s happening. Grove Bags use a specialized film that regulates humidity passively, so you skip the daily burping routine, at some cost in hands-on control and the ability to peek in without opening the bag. Both can produce excellent results.
My buds feel sticky and slightly damp even after a full dry. Is that normal? Resin-heavy, trichome-dense strains (Candy Gas is a good example) often feel tackier to the touch than airier, less resinous strains, even at a correct moisture level. That stickiness is resin, not necessarily excess water. Trust your hygrometer reading over how the bud feels in your hand, since touch alone isn’t a reliable moisture test on strains with heavy trichome coverage.
The Bottom Line 🌿
Curing cannabis isn’t complicated once you understand what it’s actually doing. You’re not just storing bud, you’re letting a slow chemical process finish the job that drying started. Chlorophyll breaks down. Sugars metabolize out. Terpenes keep developing instead of just sitting there. All of that takes time, a stable humidity range around 58 to 62%, and a little bit of daily attention early on that tapers off as the weeks go by.
Rush it, and you get grass-flavored, harsh-smoking bud that’s wasted a lot of the work you put into growing it. Slow it down, hold your humidity steady, and burp on schedule, and by week six you’ll understand exactly why growers who’ve been doing this a while treat curing as seriously as they treat the grow itself.
If you’re working with something terpene-forward like Candy Gas, this matters even more. That candy-and-diesel layered flavor people talk about doesn’t happen by accident. It happens because someone dried it slow, jarred it right, and had the patience to wait past week two before judging the results. Give your own harvest that same patience. It’s the cheapest upgrade you’ll ever make to your own weed. 🍯
